A Technique for Cartoon Character Extraction
Posted: 21 March 2026 at 12:00:00
Introduction
I have long found the idea of upscaling cartoons to be an interesting prospect. While I don't think cartoons actually need to be in a resolution higher than 1080P, it would be neat, as a technical challenge, to create a faithful replication of a frame in a higher resolution. Or, at least, for many years of my life I thought that was what I was looking for. What I, and I suspect many others, are actually looking for when they come to an upscaling algorithm for TV shows is that the magic AI or algorithm removes all the blockiness, softness, and other compression artefacts we subtly notice, but don't quite consciously observe.
On the subject of AI, I am very aware of many, many AI based projects that attempt to upscale and "remaster" cartoons (or shows in general). I have tried out a number of them, and found that they all have unintended consequences, or even intentional decisions by the creator, that breaks the aesthetic and design decisions of the show's creative staff. Whether that's because the AI adds new detail that doesn't quite gel, it removes the "dirtiness" of background brush detail work, or it tries to add fake frames - it always feels like it ruins the art.
That's why I have attempted for a long time to create a program that can upscale cartoons without using "black box" AI models that one shot the upscale. I'm not entirely against using AI (although generative AI is extremely unlikely) I want the process to preserve the original art as much as possible. If you cannot distinguish any difference other than the image looking cleaner, I have done my job.
What I am presenting here is a method for extracting cartoon characters, which works using entirely non-AI methods. It is a prototype and thus doesn't 100% work in every case, but it proves that the concept works. You could then further use this to put the character art and the backgrounds into separate upscale processes, such as vectorising the characters, and using more traditional upscaling and deblocking algorithms on the background art. You can also use this to make emojis for your Discord server, if you like.
The main caveat is that this works by the fact that many cartoons outline characters and other prominent Flash-like animation with black outlines, while leaving the background without this linework.
Shoutout to my friend Crystal, who helped walk me through some of the maths, as well as show me in Krita how he would do the linework extraction. The method for stage 1 to 4 is largely based on his demonstration.
Tip: you can click any of the images in this article to go to a full resolution, uncompressed version of the image.
An example
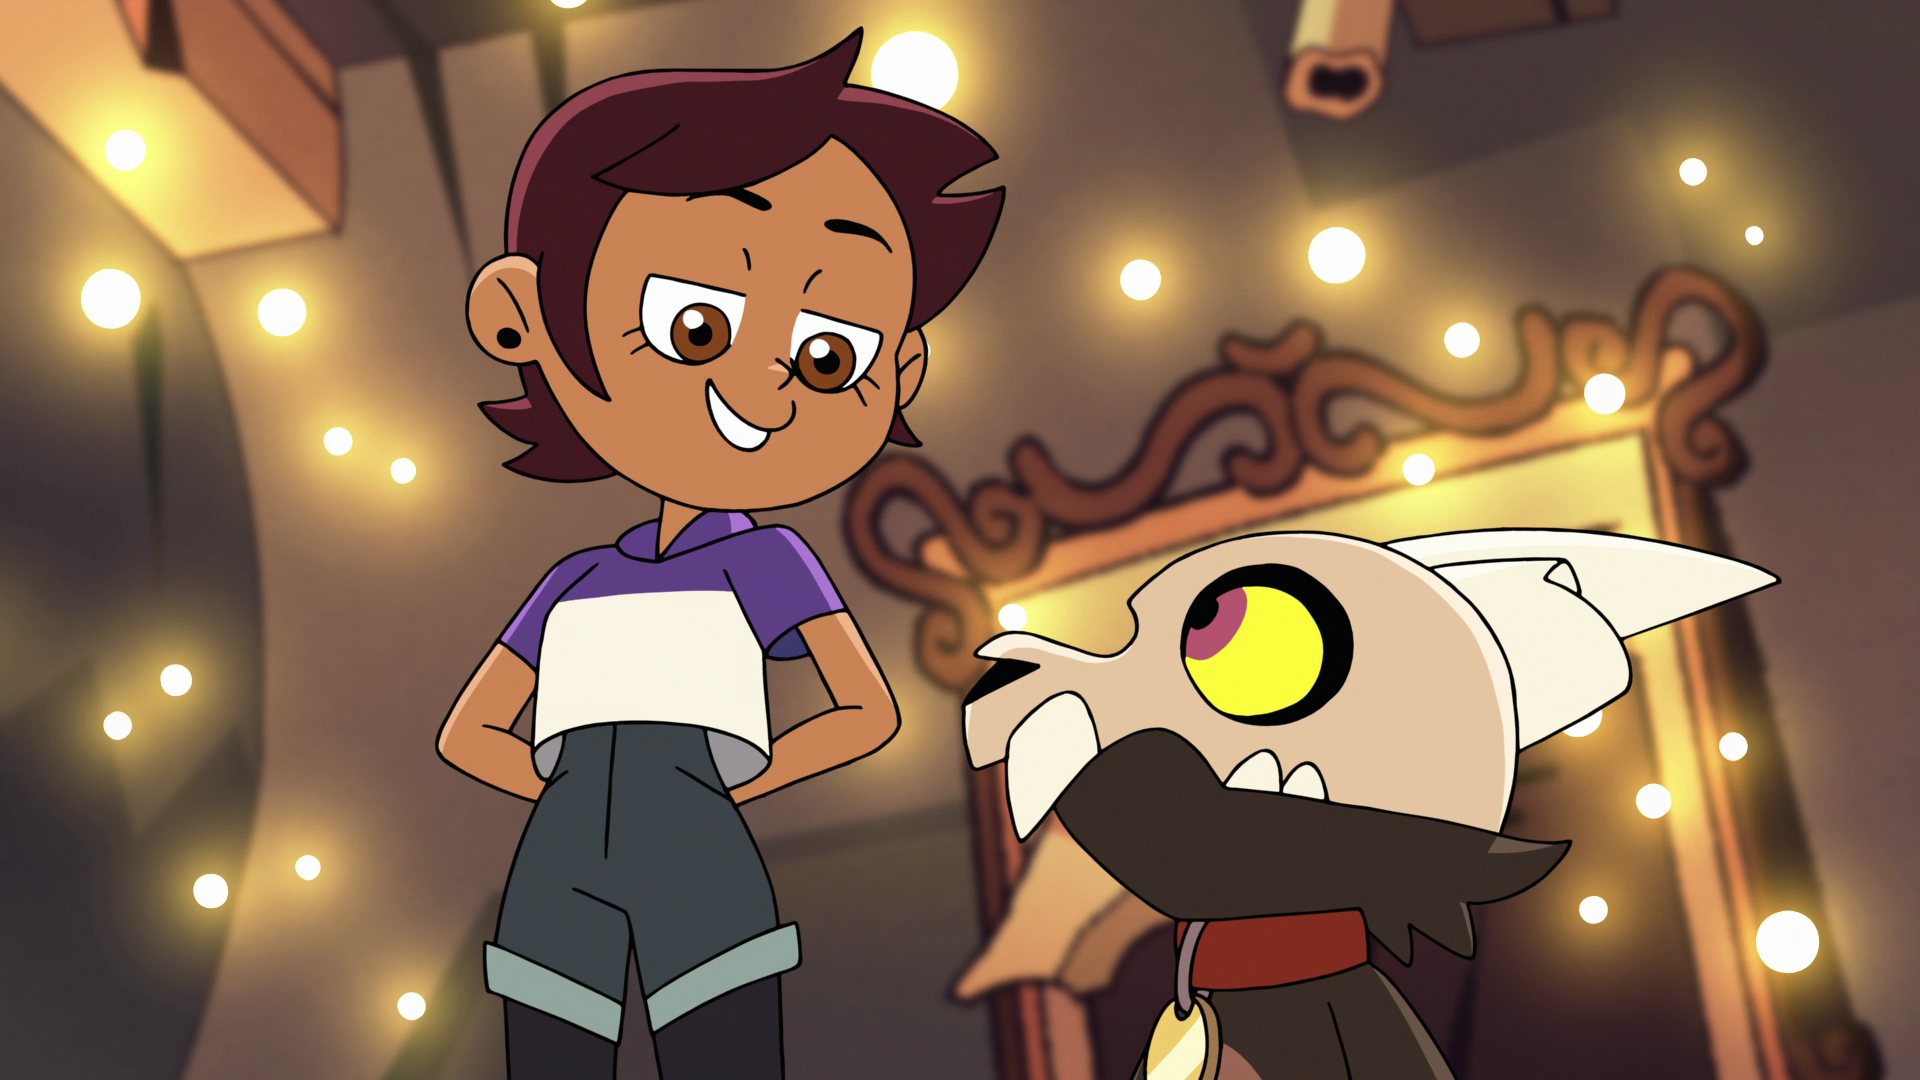
I'm going to walk through an example of how it does work on a frame from The Owl House's S01E04 episode The Intruder. Later on, I will go through some examples where it doesn't work, which are largely problems with my implementation, but may be very difficult to fix in all cases.
Input
This is an ideal candidate for my algorithm. The background is light. The characters do not intersect the frame border and are large enough to have thick linework.
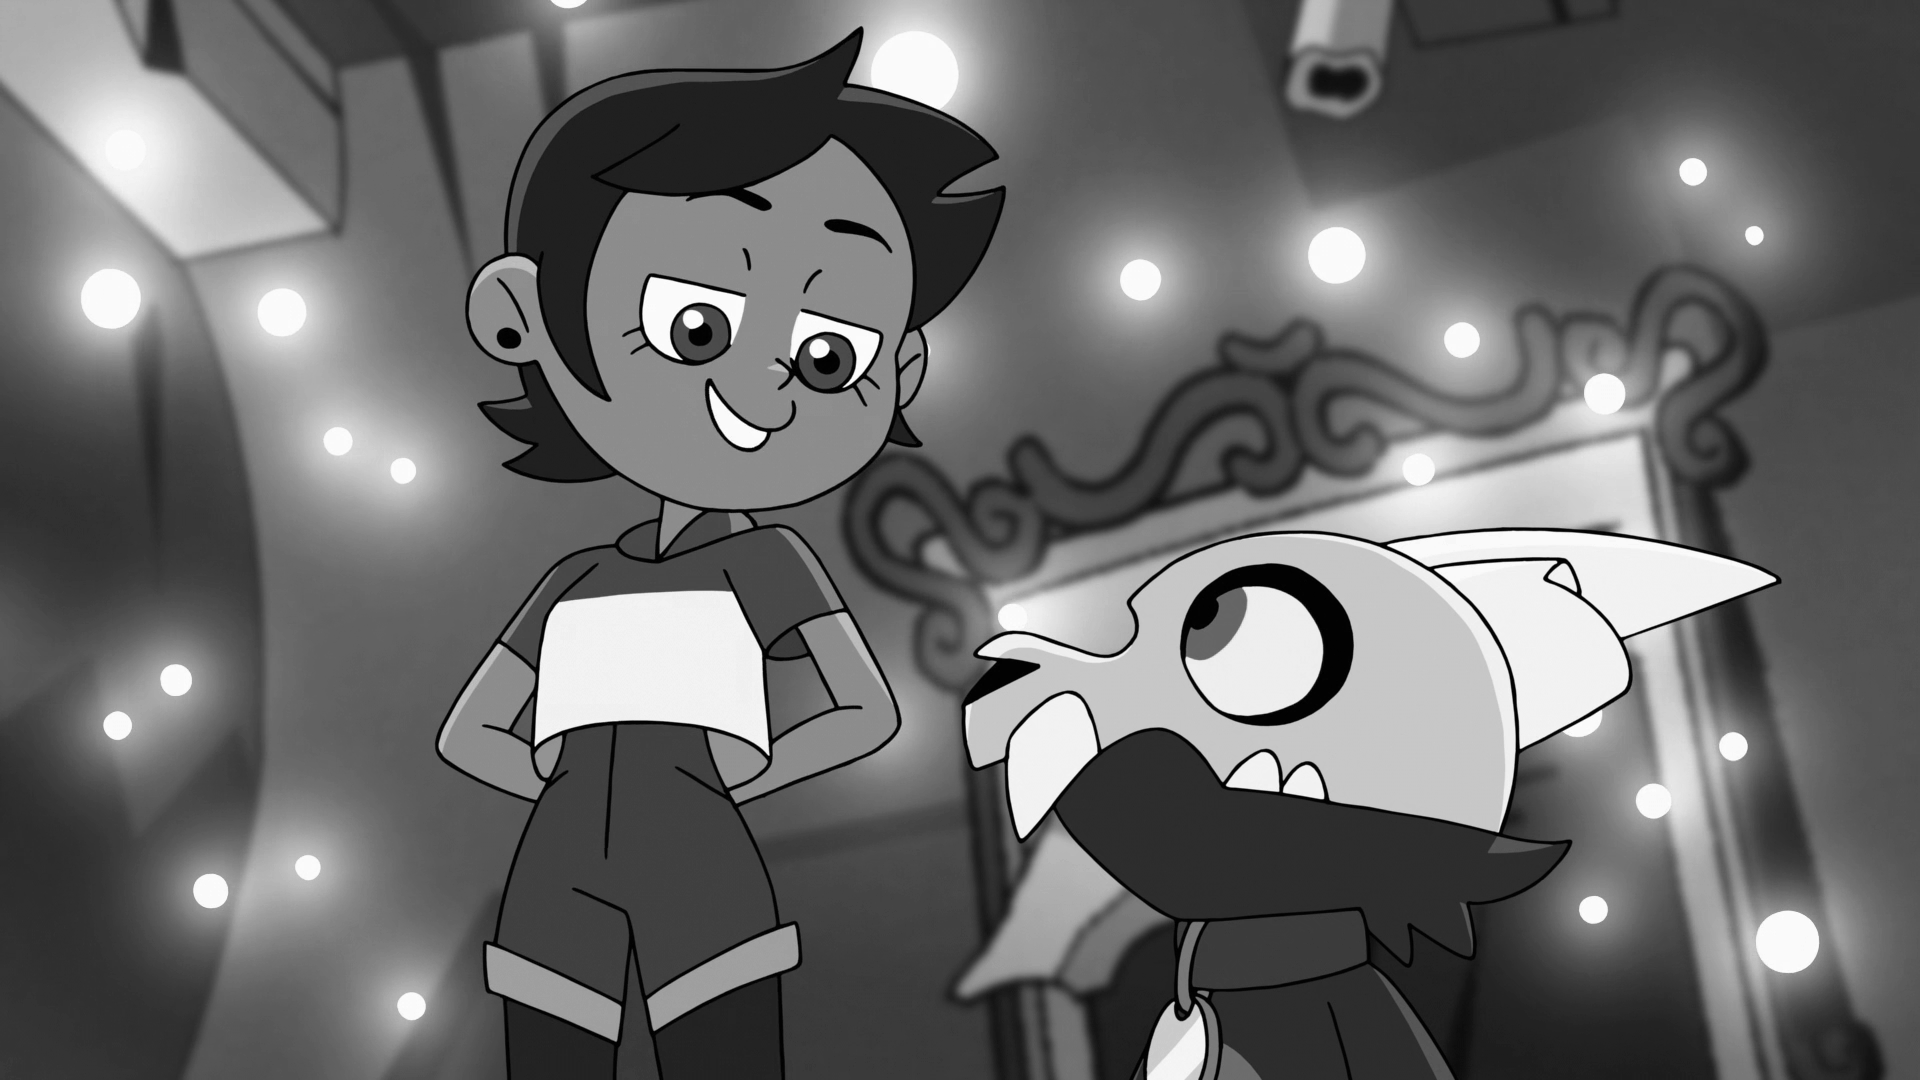
Stage 1 - greyscale
Because I only care about the "darkness" of any given pixel, I first convert the image to black and white. I settled on doing a BT.709 conversion after playing with the few options in Krita. It's a pretty standard conversion - the BT.709 standard was published in 1993, and created for HD television. It also seems to do a good job at not making the frame so dark linework gets indistinguishable from everything else - most of the time.
You might see the darker portion of Luz's hair and find it difficult to see the outline vs. the hair colour, but it's a big enough gap in brightness that the algorithm can distinguish it.
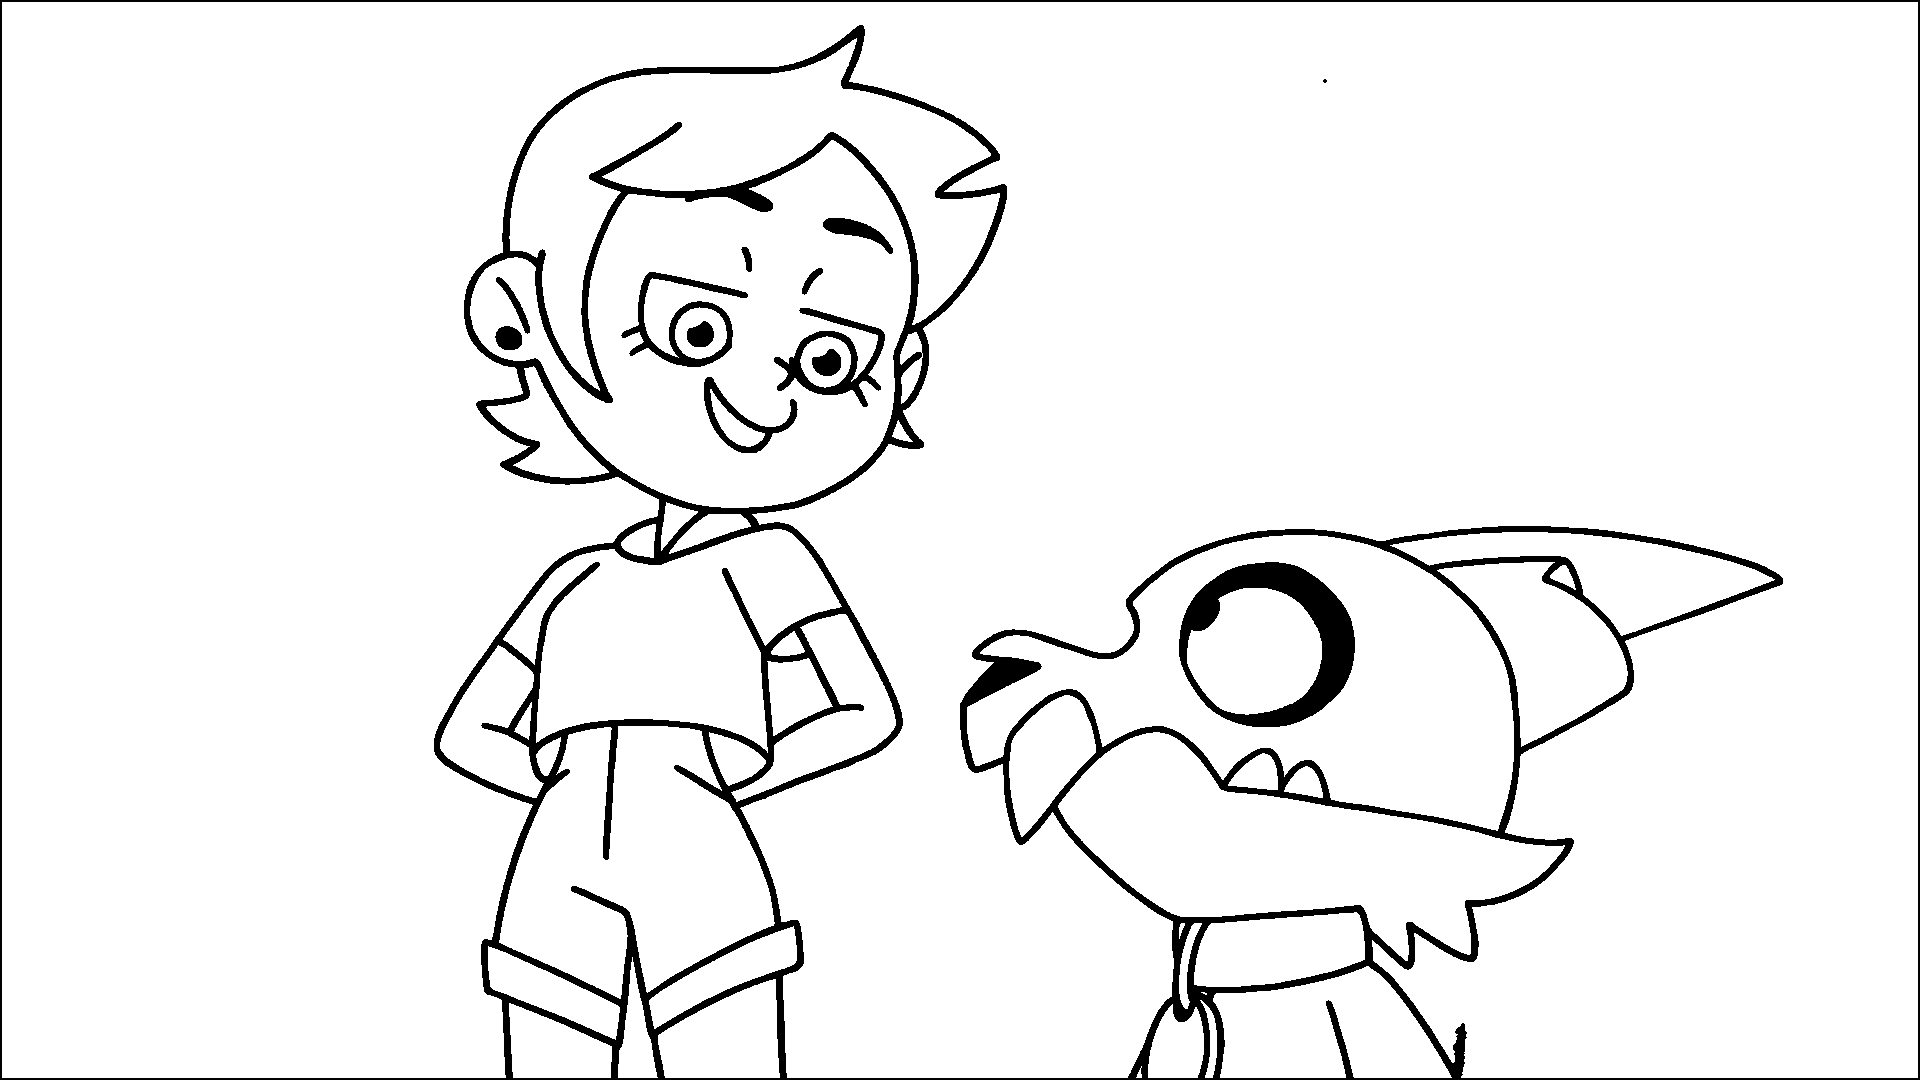
Stage 2 - first interpolation
This is the stage where you hopefully see clean linework, or else the rest of this process will fail. You can have tiny gaps between the lines, the next stage should help with that, but if large portions of linework are missing, the line gaps won't close and stage 5 will fail.
This uses a linear interpolation, at present setting the start value to 0 and the end value to 14 (out of 255). The effect is that any pixel with a value of 14 and under will be copied into a new frame buffer, extracting any pixel considered to be black enough to be linework.
Stage 3 - blur
At this stage I blur the frame buffer using a 5x5 Gaussian blur kernel to blur the image. This serves to hopefully help close any tiny gaps in linework, combined with the next stage. Different kernel sizes could be used to potentially close wider gaps, but may cause more background pixels to be pulled in alongside the linework on the outside edges.
You can see at this stage there is a black border around the image, for my prototype I didn't implement the kernel being able to process the edges of the image, where there is no data to provide to the kernel.

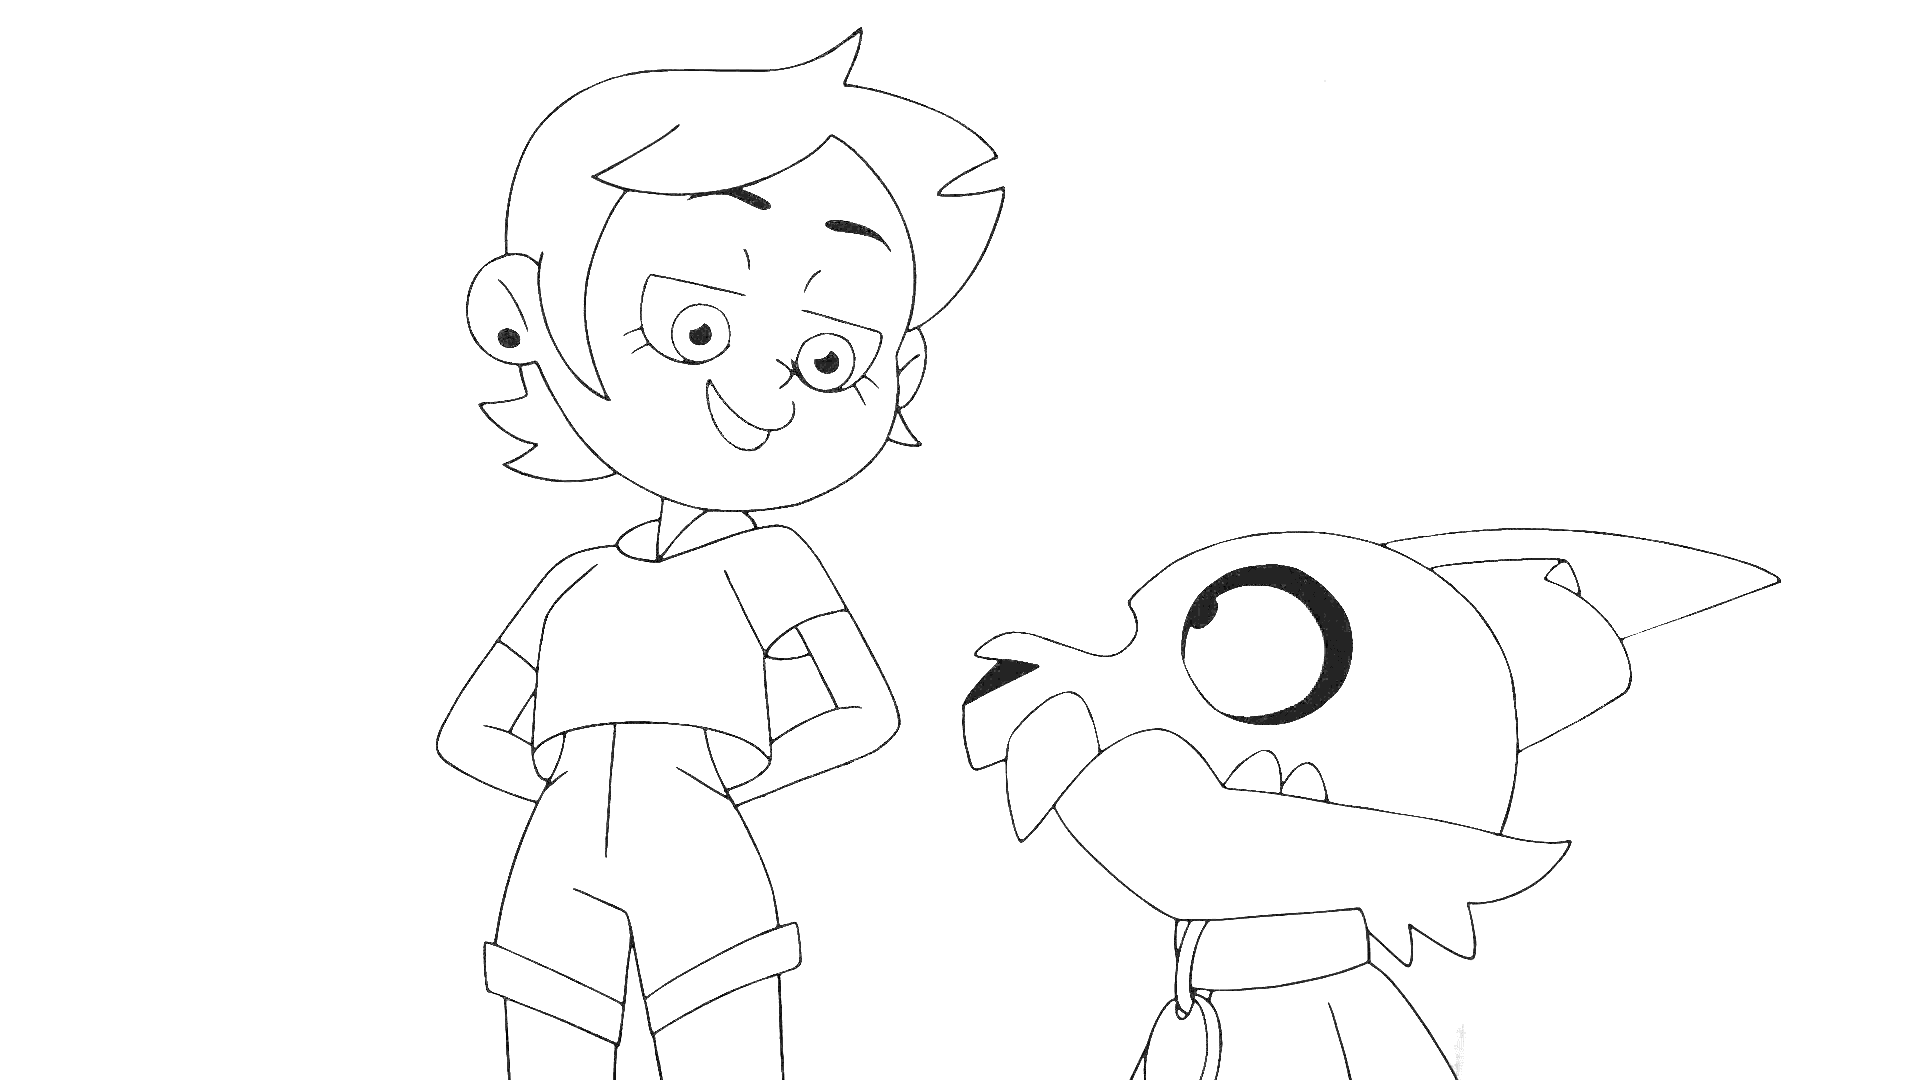
Stage 4 - second interpolation
I perform a second linear interpolation, this time setting the start and end values to both be 250. It causes all pixels that aren't very very close to white to become black (pixel value 0). At this point, I am ready to start making the mask. This is likely where my settings are too aggressive and cause the background pixel issue I have noted earlier to happen in the final image. Lowering the threshold would ignore more pixels that aren't highly correlated with being gapped linework.
You can see a barely visible floating dot in previous stages is now a very noticeable floating dot in this frame.
Stage 5 - background fill
For stage 5 I fill the background with pixels of value 128. The value here doesn't matter as long as it's not 0 or 255, so it can be distinguished from the linework and the inside art of a character. You can notice here that there are portions of background that didn't get filled in, such as between Luz's arms and her body.
The way the background fill currently works is that the program does essentially a "ray cast" from the 4 corners of the frame. It goes from one corner to another (but not diagnoally). If it hits any non-white pixel, it considers that a bad place to start a flood fill, because it likely means a character is on the edge of the frame there. If it does get to the other edge uninterrupted, it will start a flood fill there. All 4 corners can independently start their own flood fill, as long as their "ray cast" succeeds.
Stage 6 - crushing
At this stage the pixel values are effectively "crushed" into 1 bit - 1 or 0. If a pixel has a value of 128 it becomes 0, otherwise it becomes 255. This creates the final bitmap mask, which allows us to cut the characters out of the frame.

Stage 7 - masking
The final stage, I apply the mask to the original RGB frame buffer. At this point, you hopefully see just the characters! You can notice those pockets of background, and the linework has a noticeable edge of the background artwork on the outside of the line, but this worked pretty effectively for a C program and technique I cooked up in a weekend or so.

A few failure cases
There are a few cases I have found where the algorithm fails. Here's two examples of it.
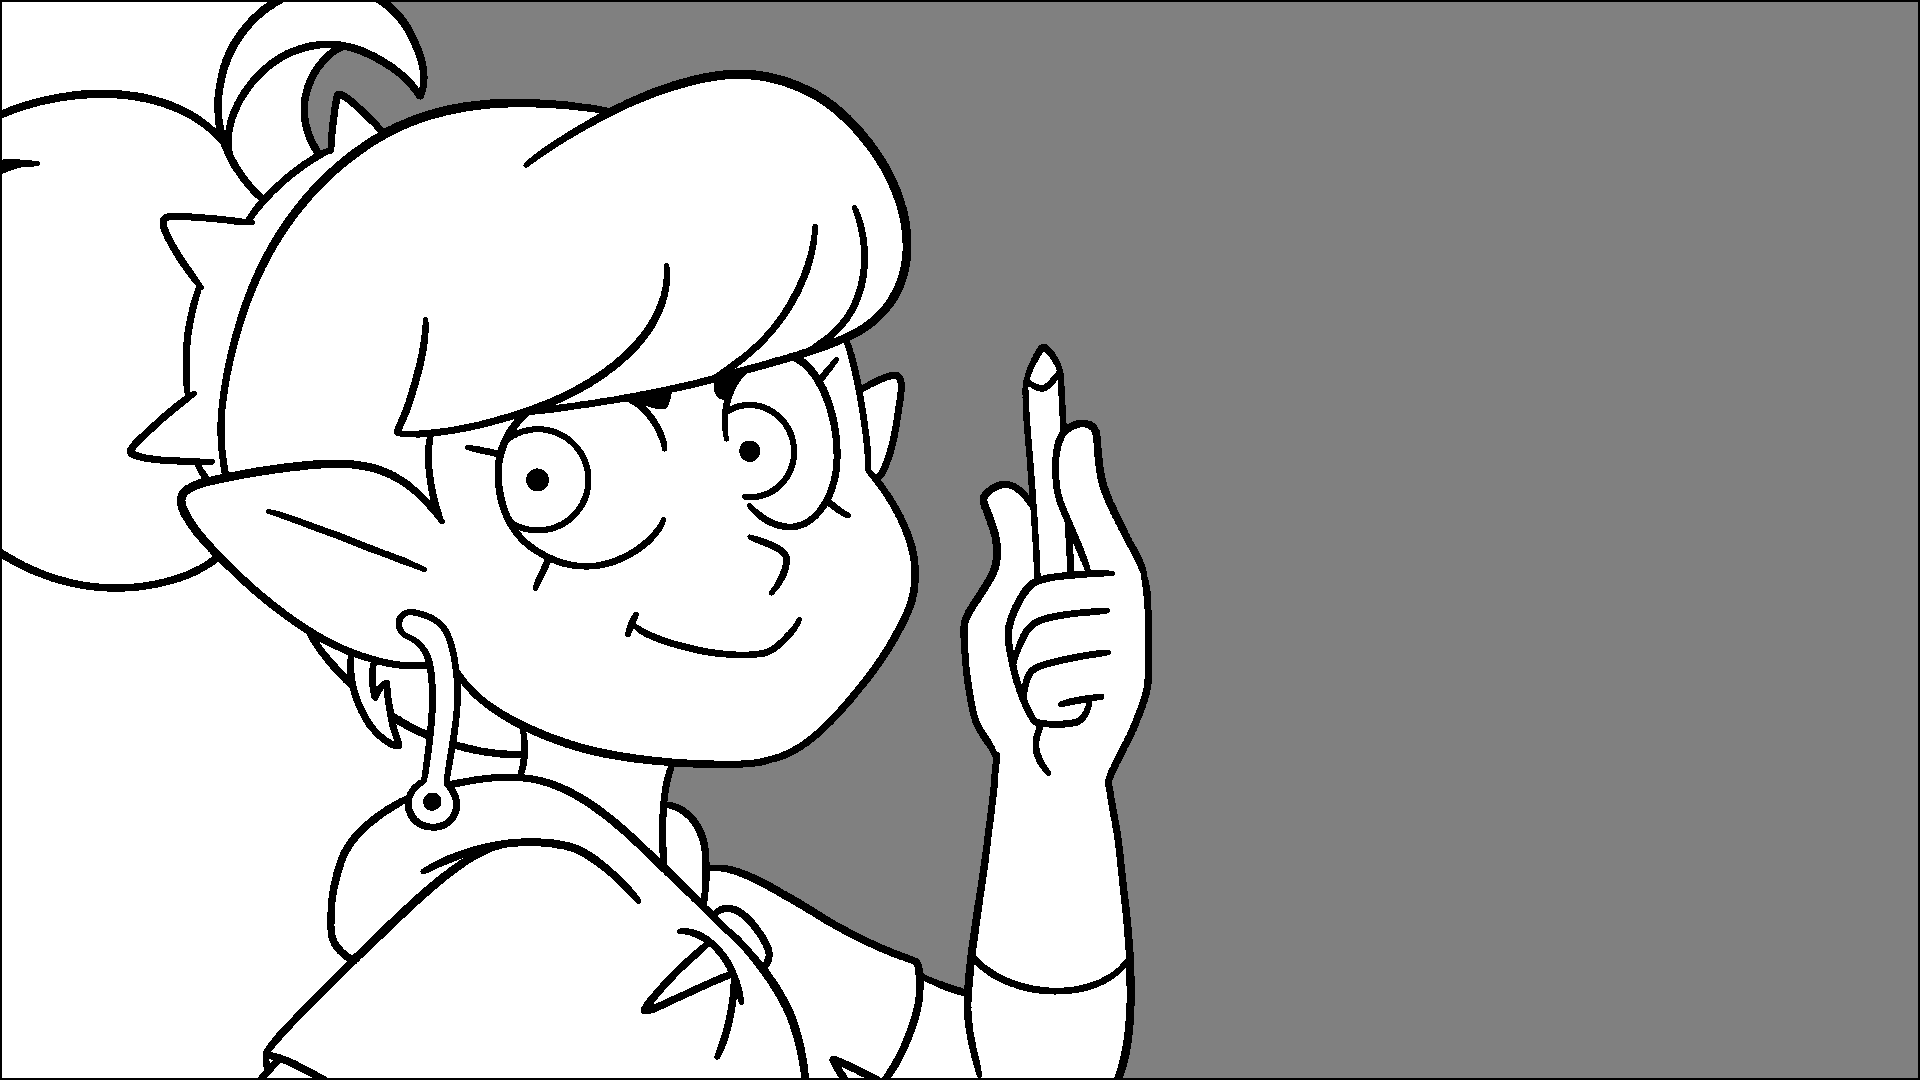
A frame of Viney
Here's a frame of Viney, from The Owl House's S01E13 episode The First Day. Here you can see her hair goes past the left edge of the frame, and a separate tuft of hair goes past the top edge of the frame.
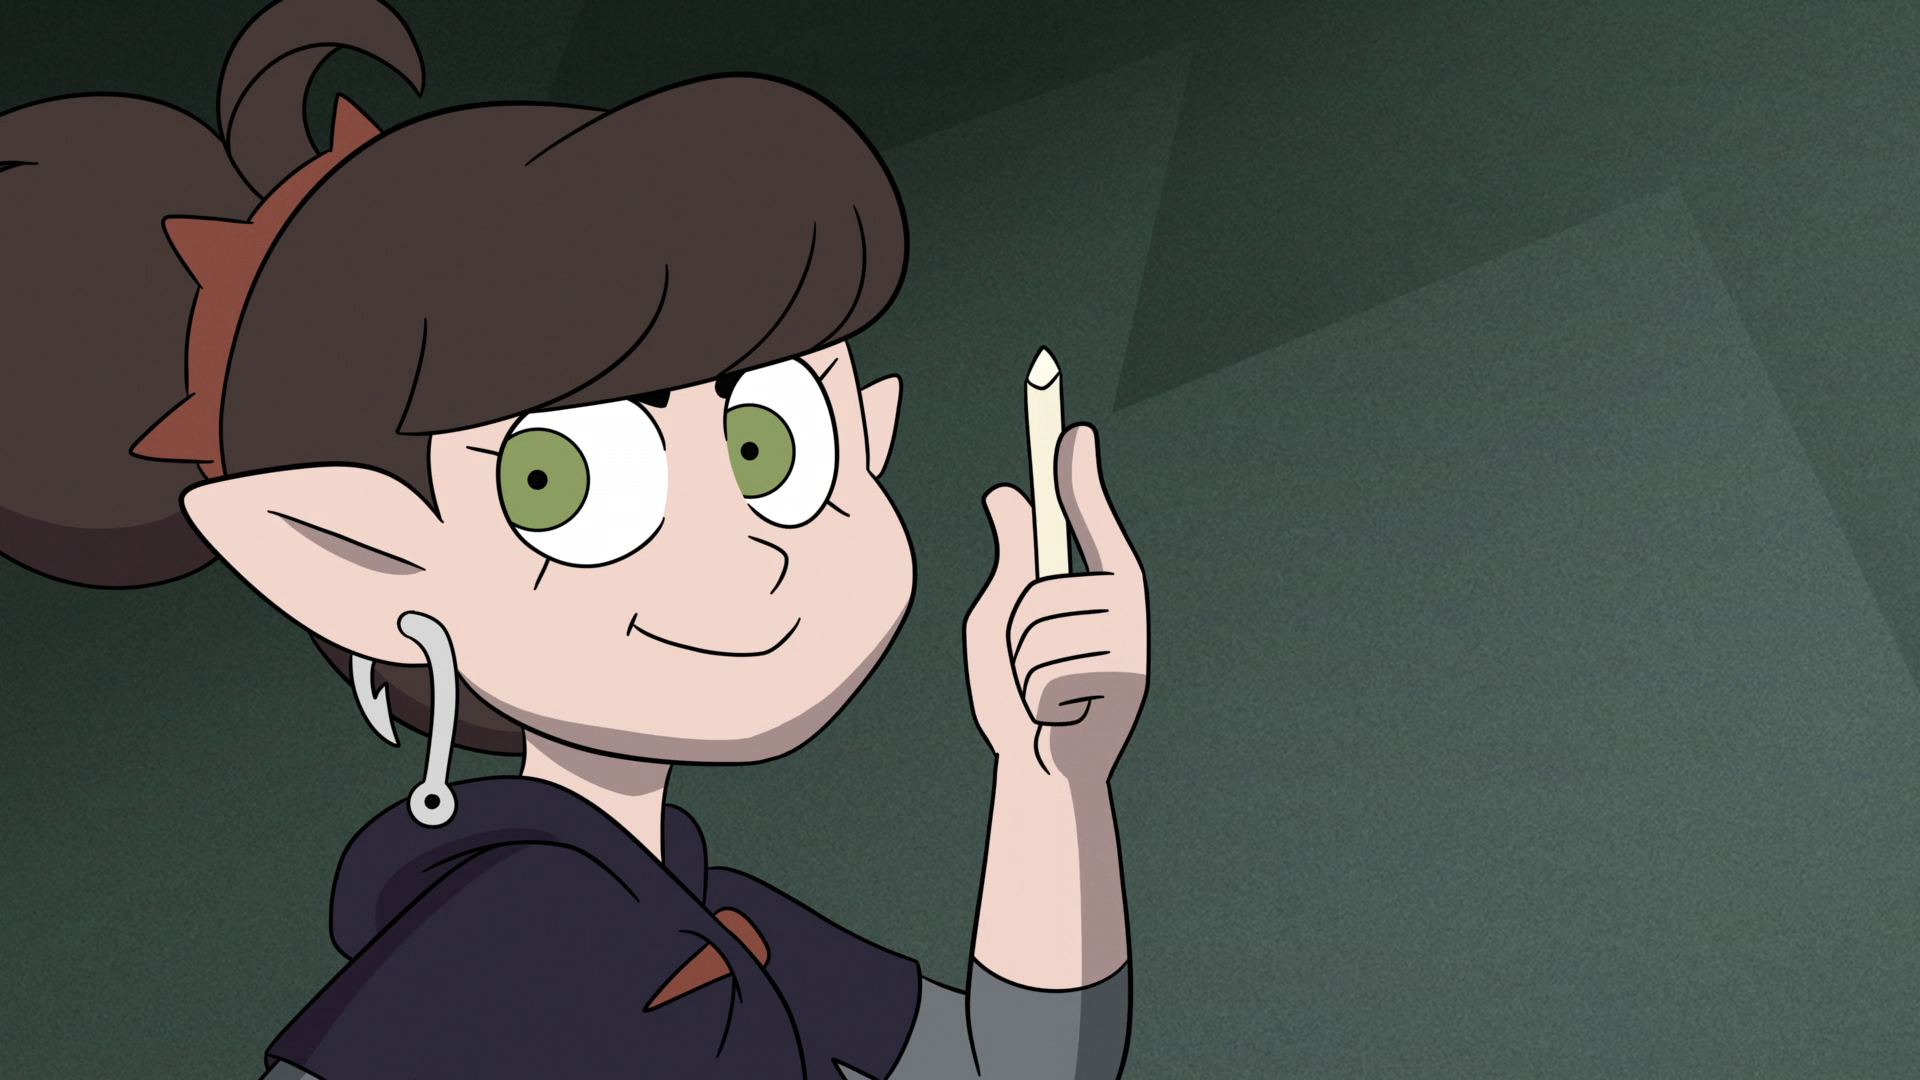
Because of this, the background in these sections is not masked out of the final frame. The "ray cast" to or from the bottom left and top left corners of the frame fail, and so those sections do not get marked properly in the crushing stage.
This could be fixed by better background detection, although it was more involved than I was willing to go to for the prototype. It's likely some form of analysis could be done to determine pockets of background art, or an entirely different method of finding the background altogether instead of laying this analysis on top of the flood fill algorithm.
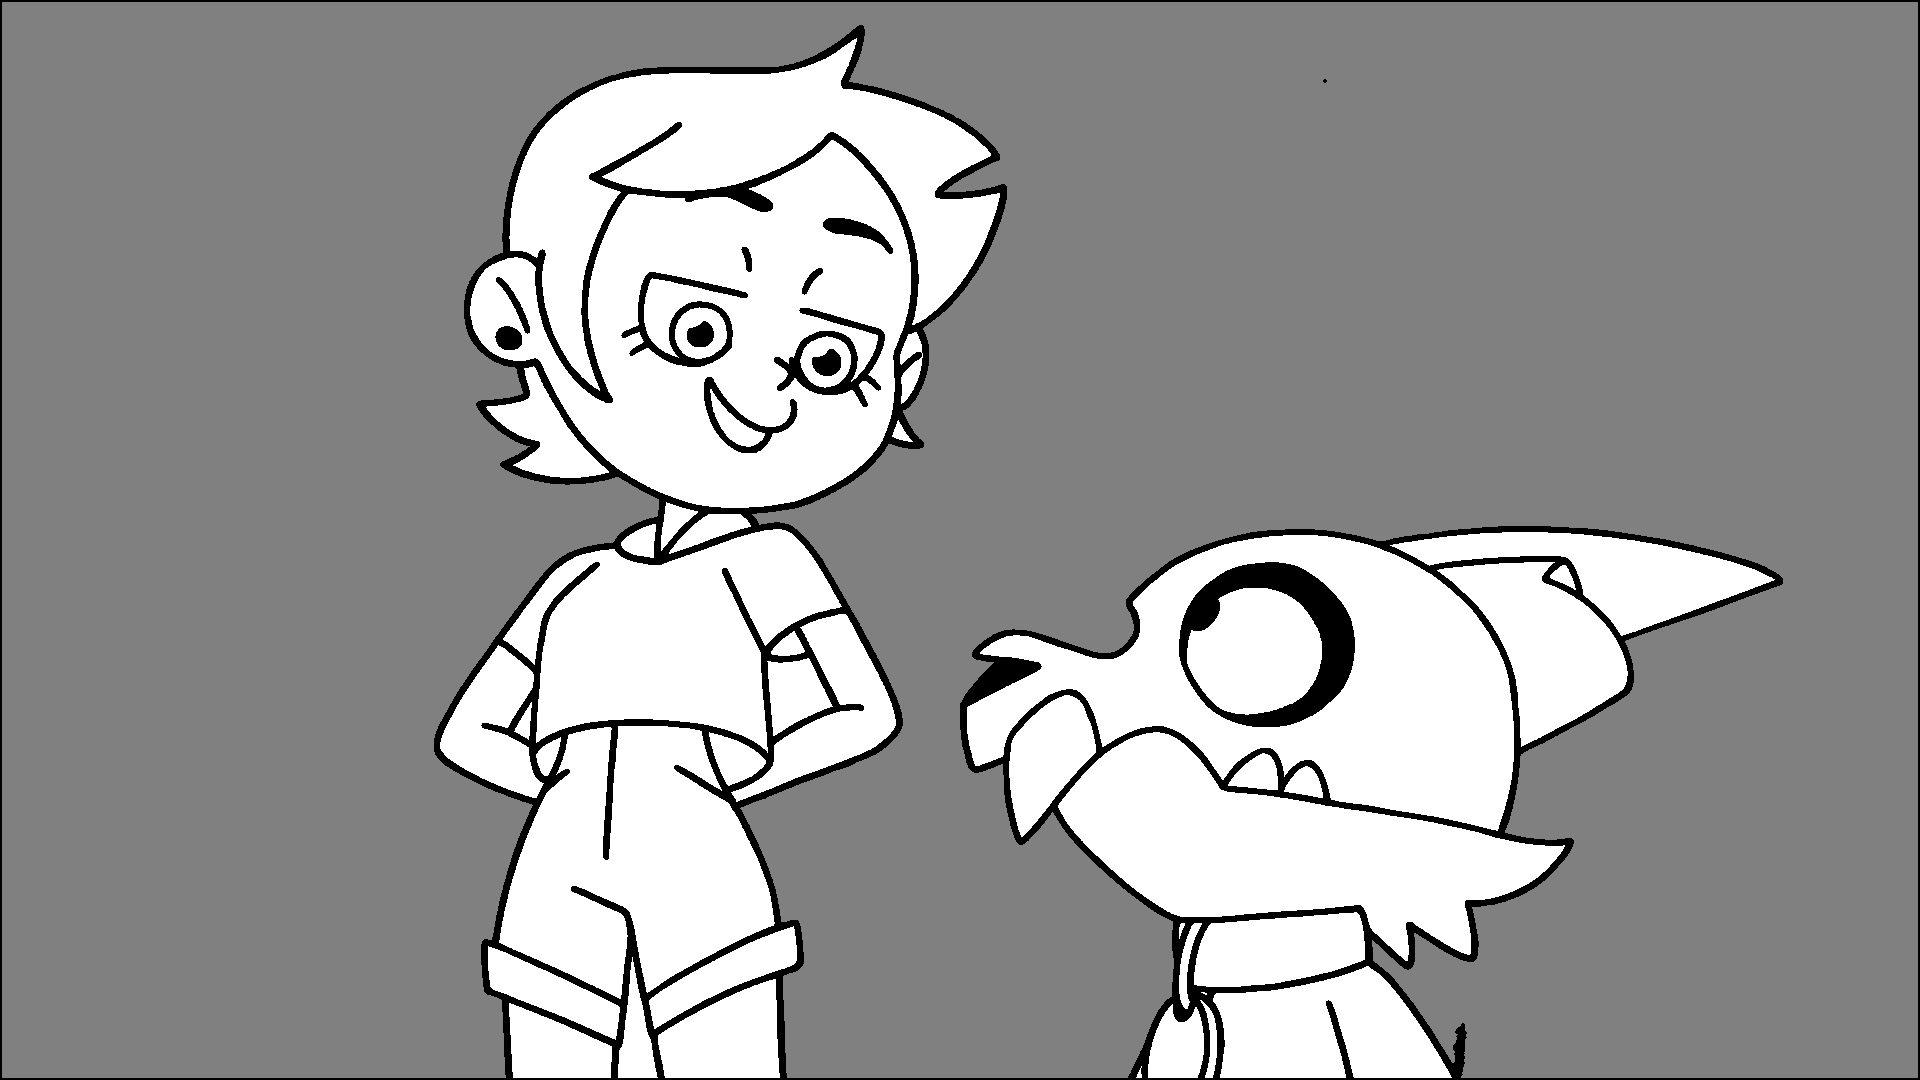
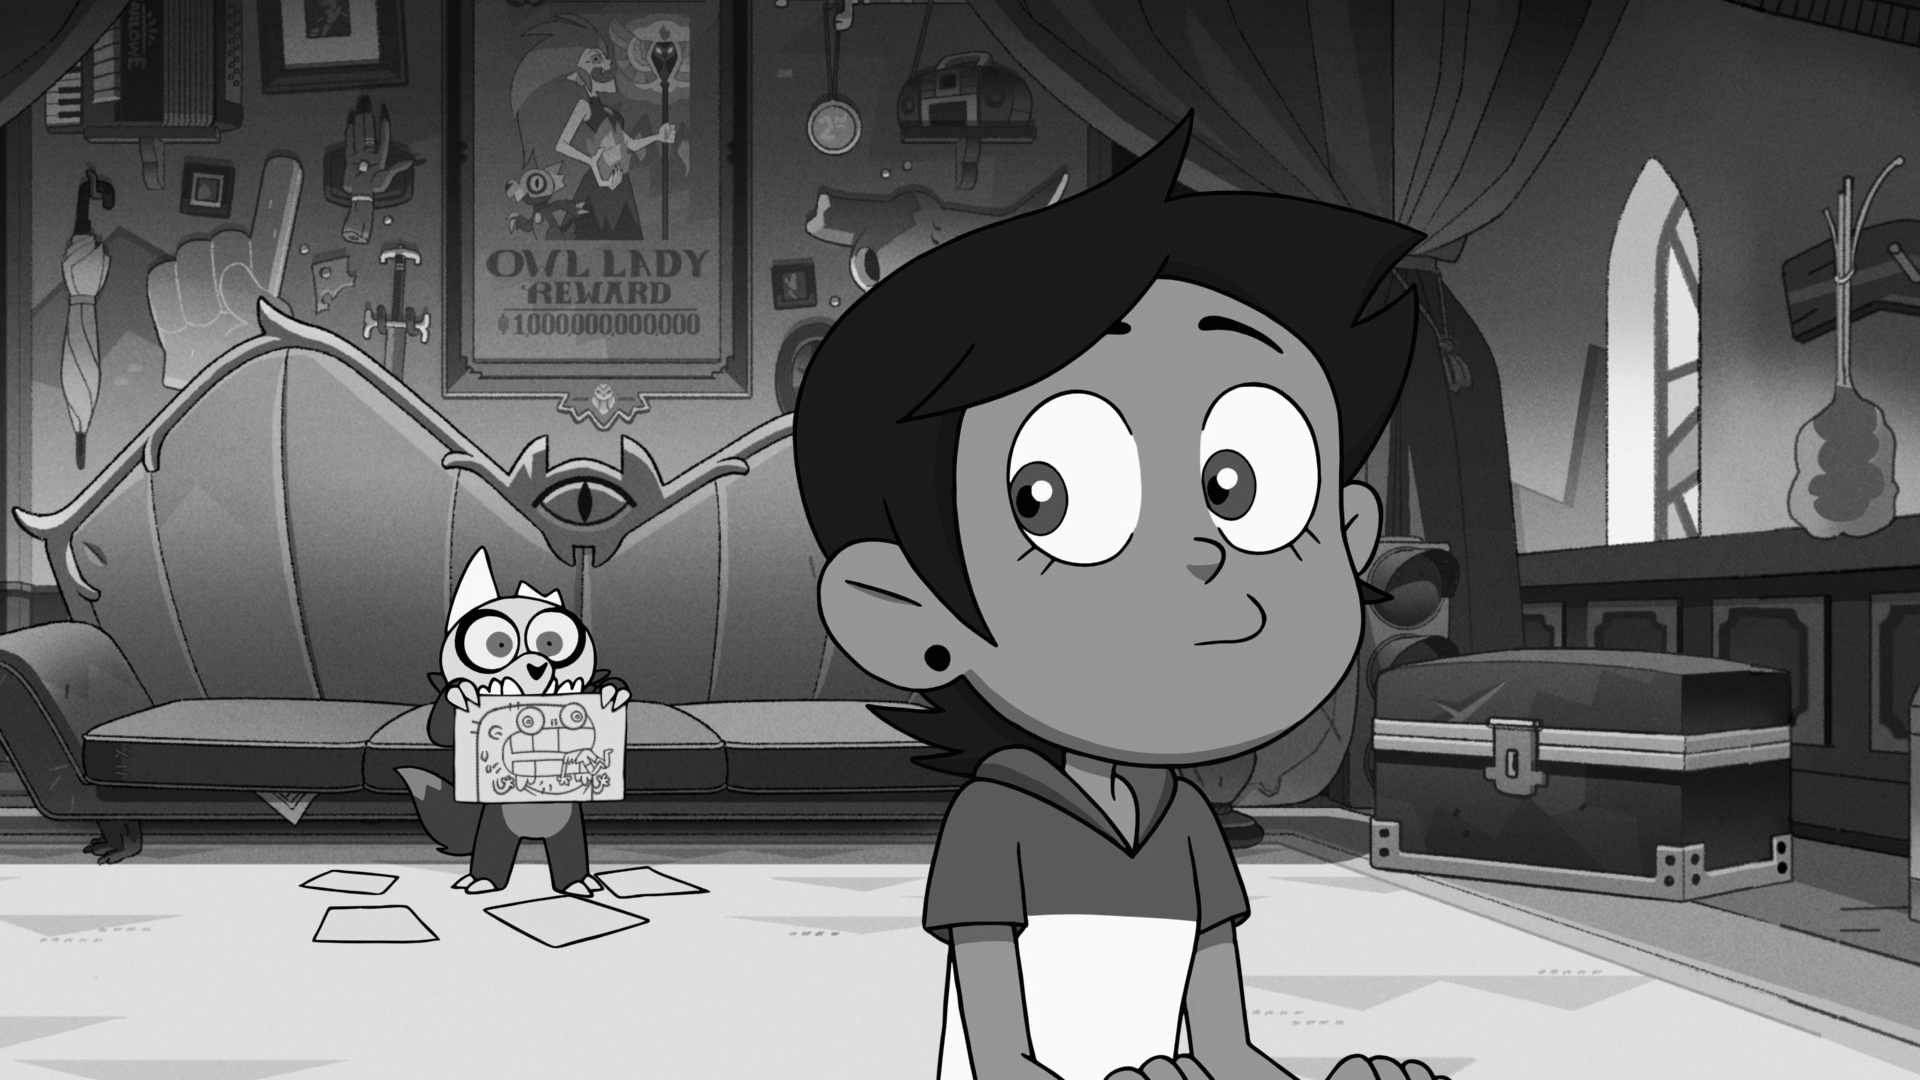
A different frame of Luz and King
This one failed in a way that makes the input frame and the final output frame functionally identical, so I'll only show the input frame. This one is from the same episode as the working example.
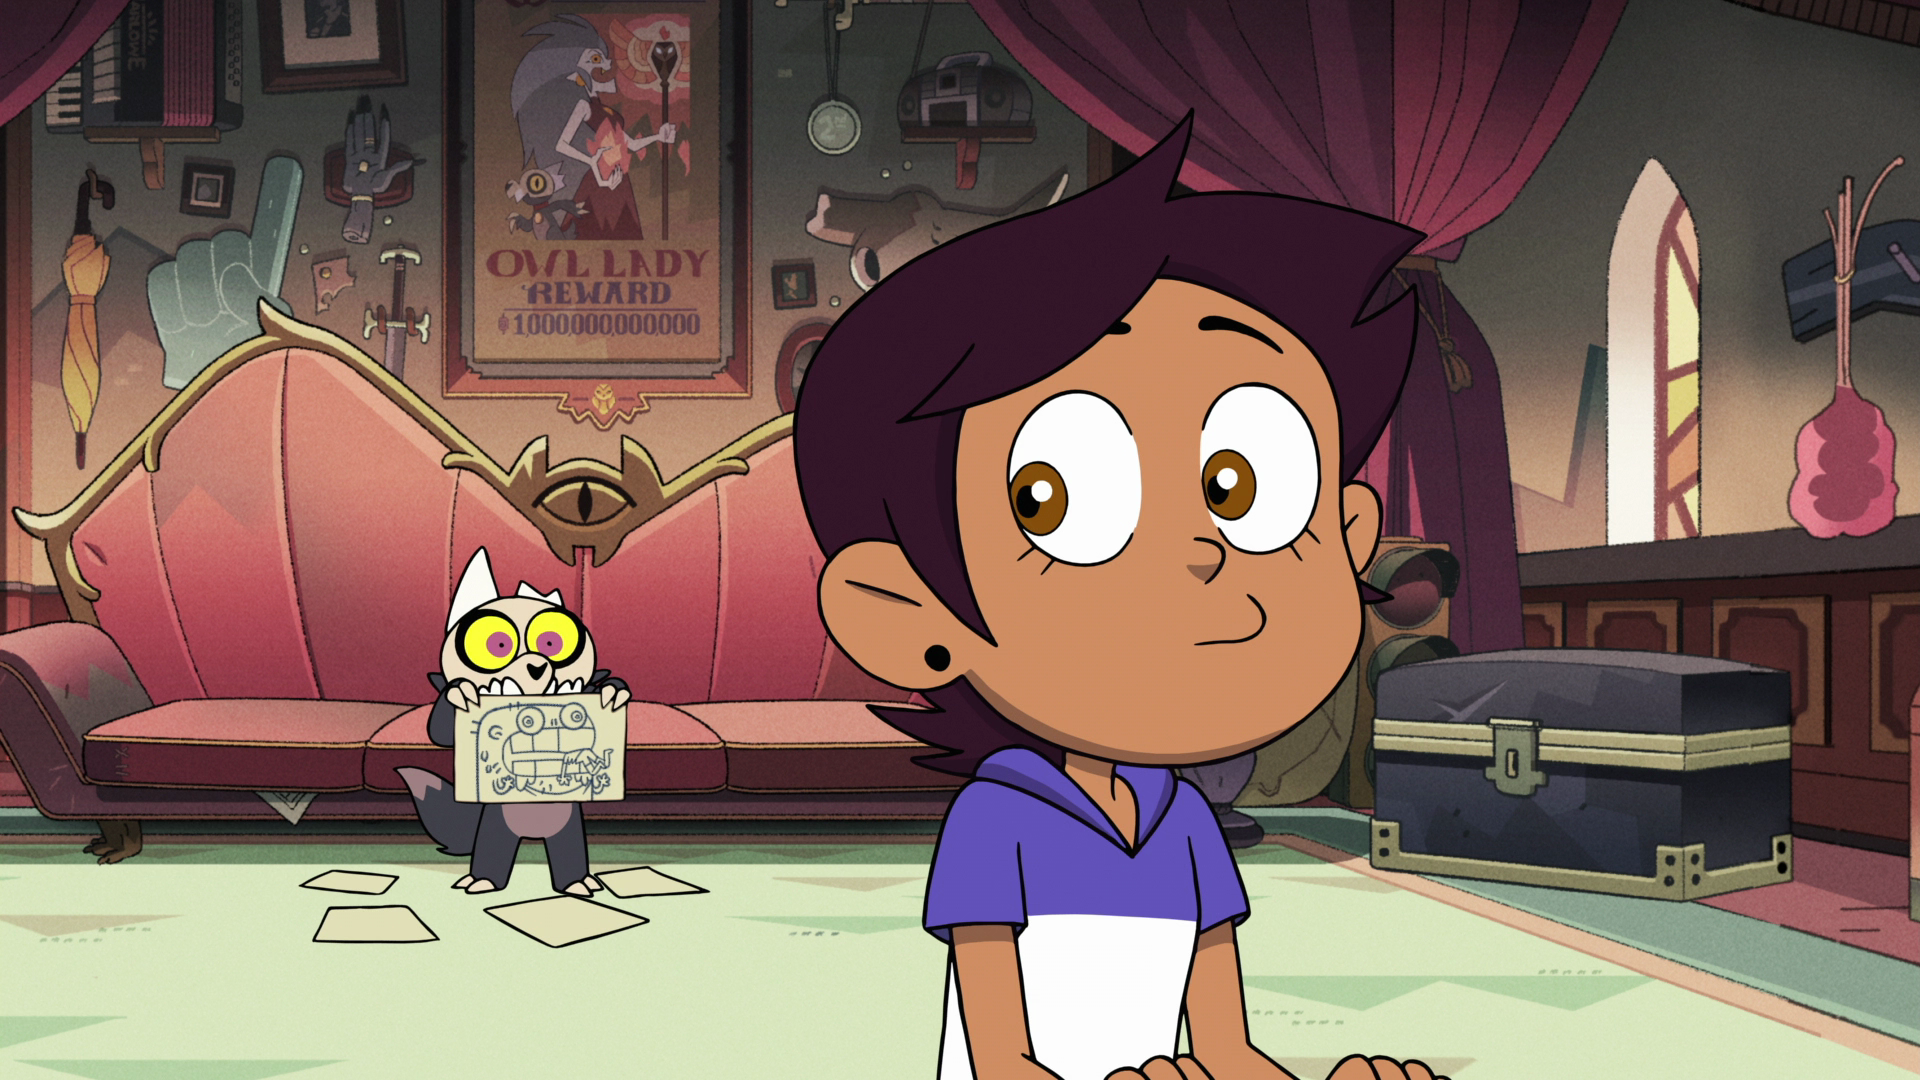
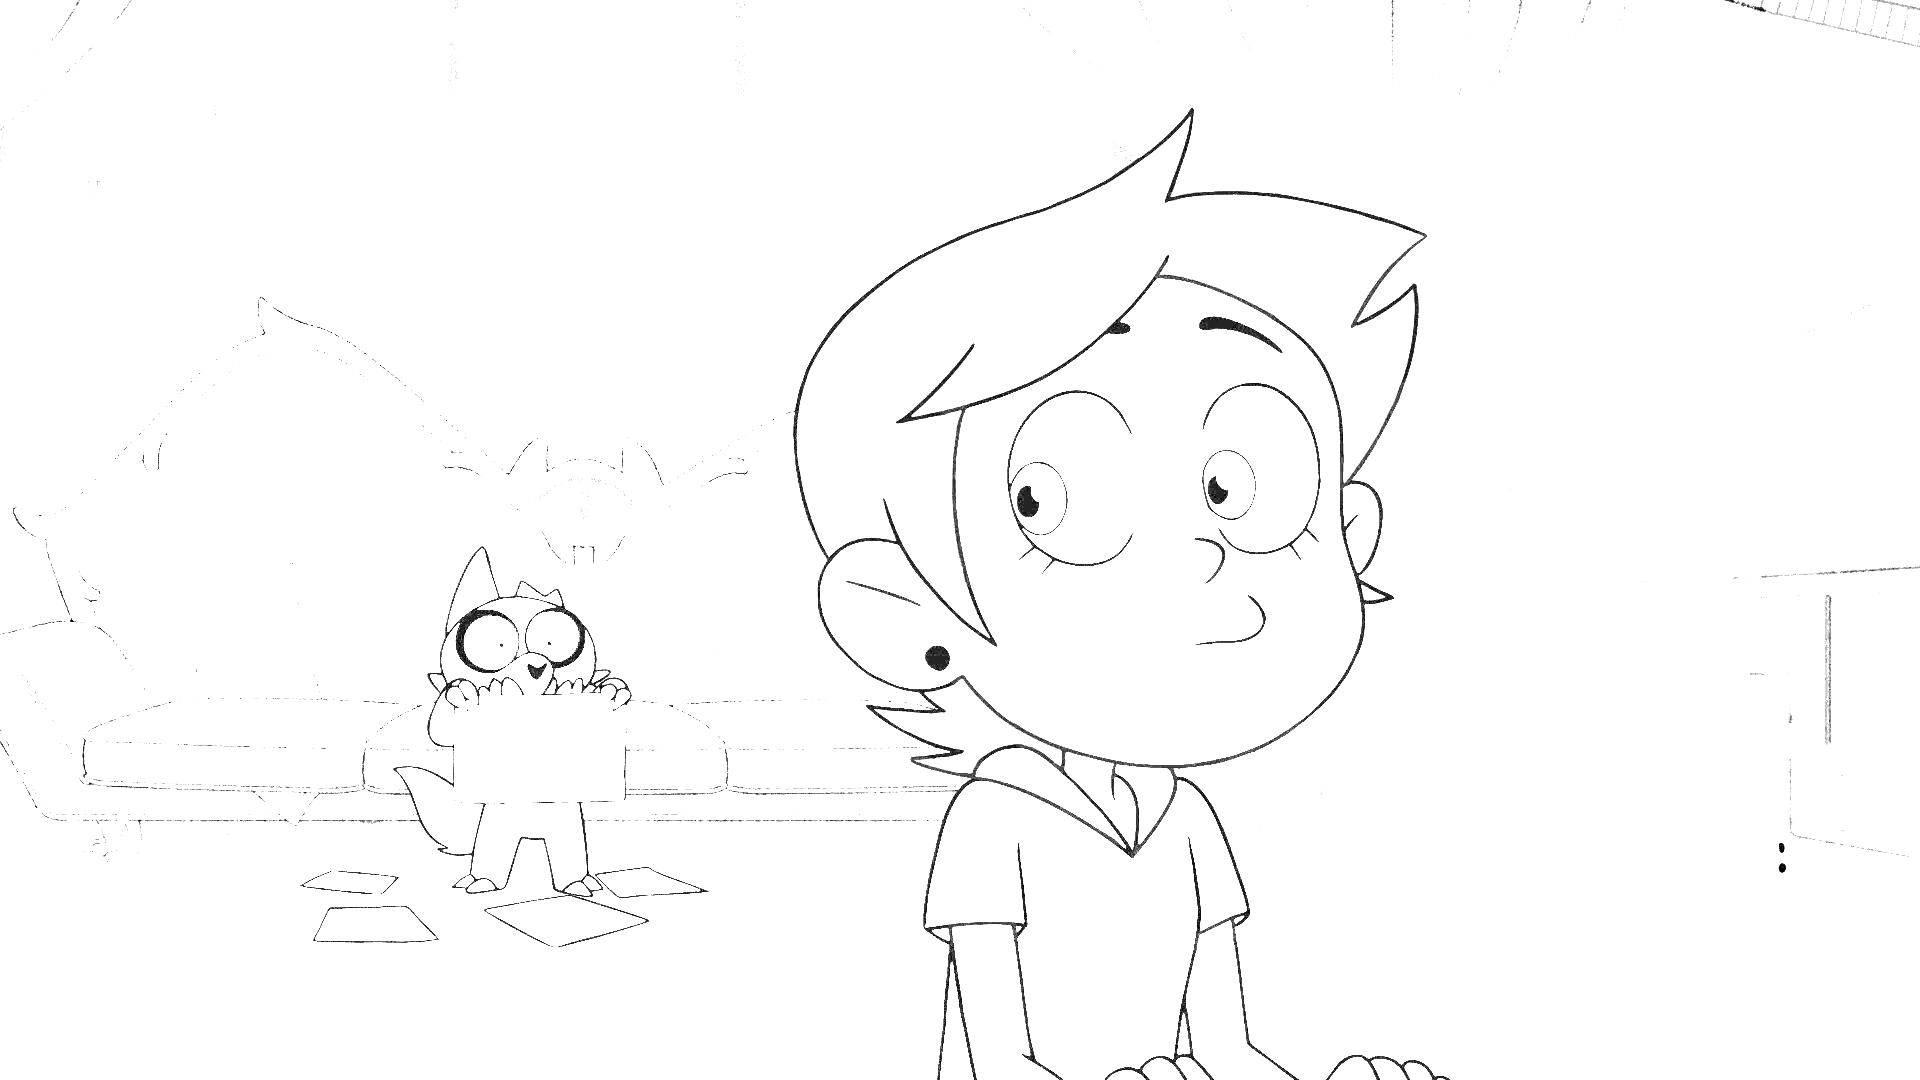
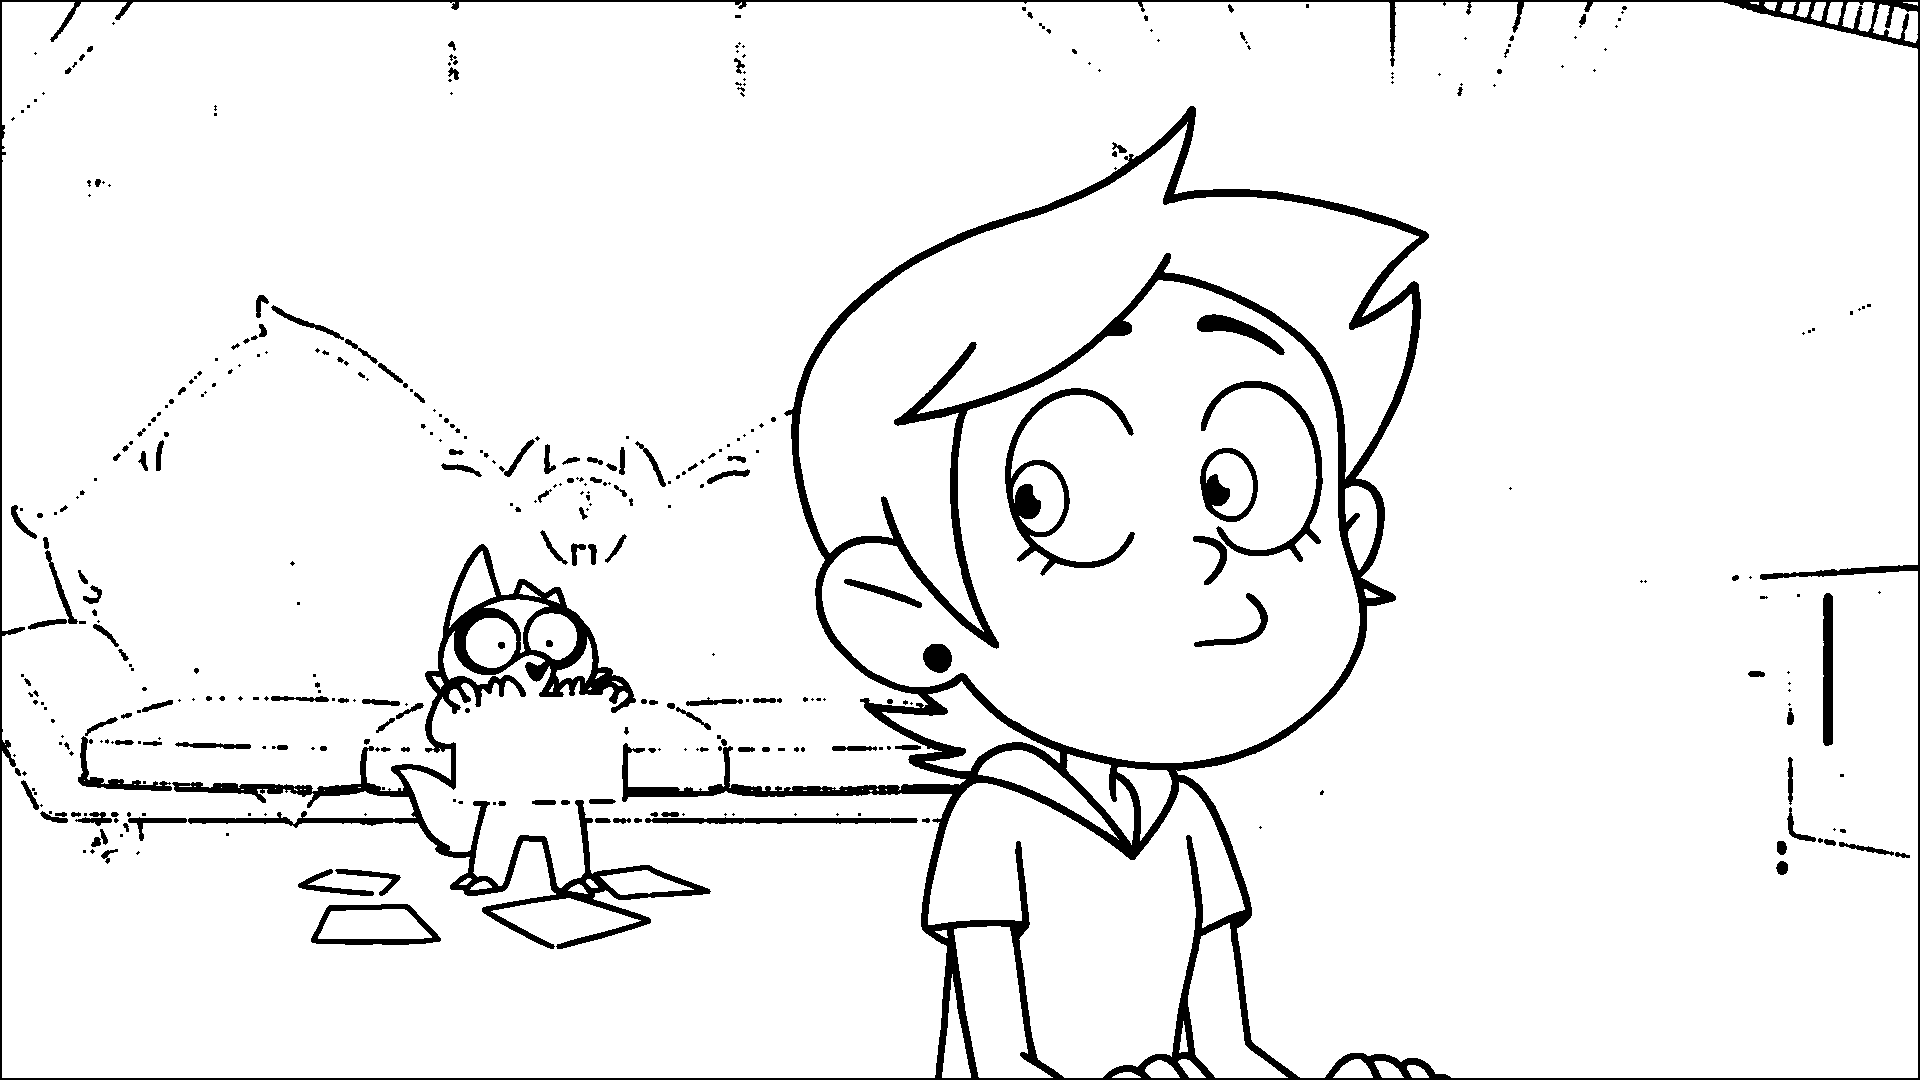
Let's look at the second interpolation output. In this case, while Luz's linework was effectively extracted, there's three different failures in this image.
- The linework for King (and his drawing paper) is not closed. The first interpolation failed to extract enough of the linework. The blur and second interpolation failed to close the gaps, as they are too large.
- The first interpolation extracted a bunch of the background art as linework, because the black and white stage made small portions of the background dark enough to be mistaken as linework. The blur and second interpolation dramatically compounded this problem.
- The "ray cast" failed to mark anything as background because it got blocked by background art that got improperly extracted as linework.
Future improvements
This is an interesting technique that shows promise. It needs to be refined, but I have a few places I've already identified.
Better linework extraction
While the linework extraction works quite well for characters that are close to the camera, the linework can become too thin and video compression artefacting causes the linework to not be dark enough to be copied in the first linear interpolation stage. It might be possible to analyse the extraction and adjust the threshold for the first interpolation. It might be more useful to find a new algorithm, such as the one from this paper, although I didn't consider myself competent enough to implement it for this.
Background pocket detection
Finding a way to detect these background pockets, or finding another method of determining background sections, will improve the result when the previous stages are working well. In our working example, this could've caught the small pockets pointed out. It's likely I could detect distinct regions in the image and then see how noisy the area is. If the area consists of large flat blocks of colour, it is a character. If not, it is background.
Fixing the pixels along the border of the image
This one is fixed by making my Gaussian blur algorithm handle dealing with the edges of the frame.
Closing tiny gaps between lines
It might be fixable via a larger Gaussian kernel, or via an algorithm unknown to me. It would definitely be fixed by better linework extraction.
Cleaning up the outside of linework
I feel getting some of the background art along the line edge is inevitable with this method of linework extraction, so going to pixels on the edges of linework in the mask and checking their RGB counterpart for how "grey" they are would help eliminate some of this.